This is Part 1 of a 2 part series covering the basics of backpacking by way of a weekend adventure in Pennsylvania’s Laurel Highlands
The goal for this posting is to offer a suitable “how-to” for someone looking to set out on their 1st backpacking trip. I’m not nearly experienced enough to author an all-inclusive guide, and a blog post or two wouldn’t be a great venue for doing so even if I did, but I think there’s enough info here for someone to get started. I decided before I took this trip with my fiancee that I would outline some of the purchases and choices I made in case any of you want to embark on a similar adventure sometime.
One would be justified in asking: why bother with all of this? All this, planning, packing, hiking, hauling and exploring… why?
Here’s why:
As is often the case, pictures don’t do the grandeur of this overlook justice… it was absolutely amazing. It was about as far away from four walls and a desk as one can get, and it was beautiful.
My fiancee and I took this backpacking trip along the Laurel Highlands Hiking Trail in 2011 and were able to really enjoy a beautiful autumn weekend in one of the most scenic regions of western Pennsylvania.
The two of us have done a lot of camping, but this was our first backpacking trip, so it was quite a learning experience. We’d been stocking up on equipment to take a backpacking trip for well over a year and had put a lot of planning into the process of getting ready for this 1st outing. We did a lot of things right and quite a few things wrong, so maybe some of you can learn from our experience and will find this useful. 1st, a short gear overview for ya’:
Creature Comforts & Hydration
1.) Teton Sports Scout 3400 – Internal frame pack (x2)
I’m REALLY happy with these packs and think they’re the perfect size for a 2-4 day trip. They have a lot of side pockets and compartmentalized storage areas, support hydration packs, have plenty of tie-down spots for gear and are relatively comfortable. For the price they probably can’t be beat.
2.) Ledge Featherlight +20 – Sleeping bag (x2)
These bags exist as a very good middle ground between cost and weight. At 3 ½ pounds they’re certainly light enough to backpack with but it’s still a very affordable sack, unlike most of the bags that come in at or below this weight. I wouldn’t recommend taking this bag into 20 degree nights, but the overnight temps during our trip went down into the mid to high 40’s and we were quite comfortable. I’d definitely recommend these bags for 3-season camping and backpacking.
3.) REI Half-Dome 2+ – Backpacking tent
A good backpacking tent isn’t cheap, but is one of the most important variables in determining whether or not you are comfortable during your trip. Much like the 1st two items on this list, the Half-Dome 2+ strikes a great middle ground – in this case between super-affordable tents and the extremely light tents that exist at the top of the price spectrum. It’s light, easy to assemble, has plenty of internal pockets and a great rain fly that extends well beyond the front of the tent, allowing for dry gear storage outside your sleeping area.
4.) Collapsible table
I didn’t catch the brand on this. It’s a table that collapses in much the same fashion as those fishing/camp chairs that are so common. The table is nice to have and I’d definitely recommend it for standard camping. That being said, my fiancee and I will definitely be counting ounces before our next trip, so the table may get axed from our next backpacking adventure.
5.) Alite Designs Monarch Butterly Chair
These things are GREAT. Alite boasts that the chairs pack down into a package about the size of a (large) burrito … and they may weigh less than one too. The chair is less than 1 ½ pounds, and I can tell you, after a day of hiking you will be MORE than pleased that you carried this little guy along. They are more comfortable than you could possible expect from a chair that you can fit in the palm of your hand. HIGHLY recommended! Check out this little video:
6.) Outdoor Products hydration pack bladder
I swiped the bladder from my Outdoor Products hydration day pack (~$30 at Wally-World) and tossed it in my frame pack. What can I say, it’s a hydration pack bladder with a bite valve and it works as advertised. 2 liters of fresh water right at hand – perfect to keep you hydrated as you trek along.
7.) Outdoor Products trekking poles
Trekking poles DO help you utilize your upper body while hiking – alleviating quite a bit of stress from your hips, legs and knees as you go. I personally get a lot of benefit from them. My fiancee may not think they’re worth the extra weight … it’s all a matter of preference. These are very inexpensive poles (~$30). I can’t think of a single reason to spend REI prices on some crazy $200 trekking poles… if any of you can justify that to me, I’m all ears! Otherwise, I’d say save your money and get a cheap pair of these – IMHO, they carry their own weight and then some (literally).
Key Food, Fire & Water Related Items
1.) 2-person anodized aluminum mess kit
A generic mess kit for about $15. Light, compact and comes with it’s own mesh bag for packing… what more can you ask for?
2.) Trangia Open Spirit alcohol stove
You’ll be amazed how well you can eat when backpacking if you can just get a few ounces of water up to a rolling boil. Even more amazing is how much you can spend on a backpacker’s stove if you’re so inclined. Don’t spend $150 on a JetBoil or MSR stove and get locked into buying expensive, hard-to-find fuel canisters for the rest of your camping days. An alcohol stove will cost you a small fraction of that, is extremely light, has no moving parts or seals that can fail, and burns plain ‘ol denatured alcohol – available in every Wally-World and hardware store in the country. The Trangia works as advertised and served us quite well. Get one!
3.) Kurgo Collaps-a-bowl
Silicone rubber bowl. Slides in the side pocket of a pack quite nicely. Keeps puggles (and other creatures I imagine) well fed and hydrated. $10. Gets the job done.
4.) 32 oz. Nalgene bottle
You probably keep one on your desk at work! Get the clear/translucent ones for easy liquid measurements and to see your water purification at work (more on this below)
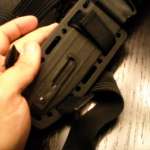
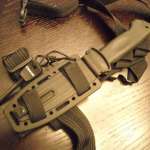
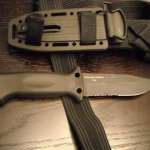
5.) Gerber LMF II survival knife
I must admit, I spent more time settling on a knife than on any other item for the trip. Maybe it’s a guy thing – I don’t know. We didn’t use it a TON on this trip, but it did get used and I’ll tell you this: if I were to be dropped into the wilderness Bear Grylls-style and could only grab one thing to take with me, this would be it… hopefully with my firestarter tied to it! If you ever find yourself in a shitty situation, a good knife is your best friend. You can whittle sticks (for tinder, kindling, spears and marshmallows), split small logs, cut down brush, cut rope, hammer tent pegs, open cans and food packages, strike firestarters and defend yourself against rampaging, man-eating bears.
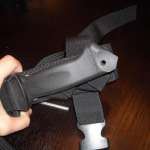
I haven’t actually tested that last one out yet, but it certainly feels like it would do the job. Here are a few pics and some of the reasons I chose the LMF II:
So first of all, the knife is a “full-tang” blade, which is to say that the metal for the blade extends down through the handle. This makes the knife tough as nails and strong enough for “abusive” tasks, like splitting logs and hammering on things… which brings up another thing you may notice: the butt of the knife. The LMF II has a pointy “skull crusher” tip at the butt of the handle. This knife was designed as a survival instrument for Air Force pilots. As such, the butt of this knife was designed specifically to shatter plexiglass (like the windshield of a crashed helicopter for example), but when holstered in the EXCELLENT sheath that comes with the knife, it makes for a serviceable hammer for driving tent pegs into hard-packed earth.
The sheath is REALLY well made, is very versatile, and – most importantly – guarantees your knife isn’t going anywhere. The sheath alone would be worth $20 to $30 to me. It straps to a belt, a thigh, a calf, a backpack and damn near anywhere else. It also features a built-in sharpener, which means one less thing to buy/carry/lose. The blade is very sharp, has great weight and balance and is just the right size – not Crocodile Dundee big, not pocket-knife small. It’s perfect. This knife kicks ass.
6.) Coleman camp soap sheets
These are water soluble sheets of soap. On the plus side, the package is extremely light and easy to pack. I bought them because they were cheap and ‘cause I figured it would save me a few ounces of Palmolive in my pack. Meh. I was disappointed. They dissolve just fine, but don’t make for a very sudsy bowl of dishwater. Save yourself on this purchase. Get a small portable container and bring some dish liquid with you – you’ll be better off.
7.) Steri-Pen water purifier
When you’re out in the wild you’ll often have plenty of access to water… POTABLE water? That’s another story. cryptosporidium, giardia, and all kinds of other little bacteria that can make you sick as a dog are swimming around in our rivers and streams, so you have to treat that water before you drink it. There are 4 common methods of purifying water for human consumption when out on the trail: ceramic water filtration pumps, chemical tablets, boiling water and UV light treatment. I chose the SteriPen and UV light treatment.
Enough has been written about water purification on the trail to fill several books (I’m sure books have probably been written on the subject) so I won’t get into ALL the pros and cons here. What I will say is that the SteriPen is fast, easy, doesn’t involve filter/pump elements that need to be replaced or maintained, doesn’t add a chemical taste to the water and is easy to pack and carry. There are pros and cons to each method. Do a little research of your own and decide what’s best for you.
Light, Navigation, Fire & Extras
1.) Newspaper, matches and dryer lint
This Ziploc represents the cheapest, and arguably most important ounce in your pack. Dryer lint is perfect flash tinder. One spark from a flint steel or a touch from a match and it’s ablaze. Get this going, feed it some newspaper, small twigs and work your way up to some burning logs. Camping isn’t camping without a good campfire. This one little Ziploc bag will get you there.
2.) LED Headlamps
LED headlamps are bright, cheap, lightweight and leave your hands free for other tasks. When we’re car-camping we bring an LED lantern too, but for backpacking this is all you need. Readily available at Wally-World and all sporting goods stores.
3.) Outdoor Products lensatic compass
This wasn’t used much during our trip… but that’s because our GPS didn’t break! For $5 this compass (and its usage instruction pamphlet) is some of the cheapest insurance that money can buy.
4.) Garmin eTrex GPS
This is one of the cheaper handheld GPS’s that money can buy… that’s why I got it. If I were GPS shopping now, I’d buy a different model. The Garmin is accurate, has great battery life, a very readable screen, and seems durable and water resistant. The problem with it is the problem that plagues many automotive GPS’s – the GPS manufacturer sees it as a “gateway drug” to high margin add-ons like updated maps – in this case topo maps.The GPS offers users no altitude data out-of-the-box, which SUCKS. Having detailed topographic maps pre-loaded should be STANDARD on all handheld GPS units… their functionality is very limited without them. The map I printed out was FAR more useful in determining our whereabouts than the GPS was as we went. The GPS served primarily as a trip computer – keeping us abreast of how far we’d traveled and how fast we were moving (important information if you want to make it to camp before sunset!)
In short, a handheld GPS is a good thing to have, but if you can afford a higher-end unit than the base-model eTrex, get it, and be sure it has topo maps pre-loaded.
5.) Alcohol prep pads and Band-Aids
Speaking of cheap insurance! Be sure to pack some alcohol prep-pads and Band-Aids in your pack. You’ll be glad you did when your bad-ass backwoods survival knife carves up your middle finger like it’s a Thanksgiving turkey. Trust me on this. I know of what I speak.
6.) Extra batteries
Headlamps, UV purifiers, GPS units and cameras all use batteries. You don’t want to be without light, water, your sense of direction, or good pictures on your trip. Bring extra batteries!
7.) Bullfrog insect repellant
It’s not sticky or oily and includes SPF 30 sunscreen. The cool fall weather made this an unnecessary addition to our pack this time, but let weather, surroundings and your level of disdain for sunburns and mosquito bites be your guide. I’ve used Bullfrog before. It’s good stuff.
8.) Paracord tility rope
We didn’t need this on our trip either, but it’s light and worth packing. Leftover food should be tied up to a tree away from your shelter to keep Yogi bear from paying you a visit in the middle of the night. We were too hungry for there to be leftovers, but I digress. Paracord can also be used to tether things to your pack, tie your dog to a tree, tie your belt loops to your waist, or tie your LMF II knife to a large stick to fashion a bad-ass spear. You never know when you may need to fend off rampaging, man-eating bears.
That pretty much covers the gear we packed. It all served us quite well and, considering that this was our 1st outing, I’d give us a B+ to an A- grade on pre-trip gear preparedness. We also packed some pretty tasty food for our trip. Like I said, you’d be amazed how well you can eat with just a little hot water at camp:
Mountain House dehydrated meals are really good! They’re tasty all by themselves, but after a long day on the trail they taste frickin’ fan-tabulous. I highly recommend the Lasagna with Meat Sauce. We also packed some Mio to flavor our water at dinner time, some granola bars, energy chews and jerky for on-trail snacking, instant oatmeal for breakfast, and some dog food and treats for our four-legged trail buddy. We certainly didn’t go hungry and all of our food was probably about 2 pounds or less in our pack. One last addition to our food rations…
These ones are pretty self explanatory! I recommend filling these with Jim Beam Black, 8 year old bourbon.
So all this, along with a map of our section of trail prepared us to embark on our trip… I’ll make that “Part II”!
- I Love it When a Plan Comes Together - September 8, 2014
- Thanks for Reading & Thanks for Sharing - January 27, 2014
- A New Way to Haul Your Bricks? - January 1, 2014


[…] Part 1 can be found here. […]